TxWeb offers unlimited email accounts on all web hosting plans with cPanel.
The emails use standard IMAP/POP protocols for incoming mail, and SMTP for outgoing mail. This means you can configure your email accounts on all major email clients and mobile devices. We also offer webmail at https://webmail.yourdomain.no/
name@yourdomain.com (your full email account address)
Connection security:
SSL/TLS
Authentication method:
"Regular password"
OUTGOING EMAIL
Outgoing server:
mail.yourdomain.com
Outgoing port:
465
Username:
name@yourdomain.com (your full email account address)
Connection security:
SSL/TLS
Authentication method:
"Regular password"
Author: TxWeb Last update: 2025-01-19 13:44
Creating An Email Account on Your cPanel Hosting
One of the greatest features that most of TxWeb hosting packages offer is the unlimited email accounts you can create within your cPanel account. If you are unfamiliar with the process of creating a new email account with your personal domain name, a step-by-step guide and explanation are provided below.
Firstly, log in to your cPanel through TxWeb Client Area or the direct link https://domain.com/cpanel (make sure to replace ‘domain’ part to your own domain name)
Once you’re logged in to your cPanel dashboard, go ahead and type in Email Accounts on the top right search bar, or if it’s visible on the dashboard, you can go ahead and click the Email Accounts option under the Email section.
After the next page loads, click on the +Create button.
Now it’s time to enter the details for your new email account. We have put on little prompts on the screenshot below that should be able to help you. As a side note, it’s always recommended to create a strong password for your email account. You can generate one from sites like https://www.random.org/passwords/
Once all the details are filled, scroll down and click the Create button.
You will then be redirected to the previous page where you can see the existing email accounts. To access your inbox, click on the Check Email button.
You should now be logged in to your Webmail interface. To skip this Welcome Page in the future, you can tick the Open my inbox when I log in option then click the Open button. In this instance, we will choose Roundcube as the Email software.
The next page will show what the Roundcube interface looks like. This is where you can view new email messages in your inbox or compose a new one. The first email message you received will contain basic information of the newly created email account. If you wish to access this account from a third party email app, for example, such as Outlook, Gmail, or Thunderbird, make sure to enter the details from the “Mail Client Manual Settings” above.
That is all there is to it! Pretty easy, don’t you think? Email account creation should be that simple and hassle-free.
Author: TxWeb Last update: 2025-01-19 02:47
Configuring Autoresponder for your Email Account
Autoresponder is a computer program that answers the emails it receives automatically. There are many Autoresponders out there, and some of them are easy to use, while others are more complex. This article will go over the steps you need to take to set up your Autoresponder through your cPanel.
A cPanel is a control panel that enables you to access a set of different tools so that you can modify your website and its settings. Through the cPanel, you decide what your website will look like to the customers or the "end users," and you have complete control over a myriad of actions. The cPanel dashboard is praised for being extremely user-friendly and for allowing everyone, including non-professionals, for doing as they please with their sites in a simple, straightforward manner.
So, with all of this in mind, let's see what you need to do in order to configure Autoresponder for your email account via your cPanel, and where you can find what you need to complete this process.
First, you need to log in to your cPanel account. After you have done that, look for the "Email" option and select the "Autoresponders" tool. This will redirect you to another page, where the button responsible for adding new Autoresponders is located and also shows all your existing autoresponders.
To set up a new autoresponder for your email account, you need to click on the "Add Autoresponder" button.
After you click this, many different settings will pop up on the screen for you to configure. Let's break down what they do:
The "Interval" setting refers to the amount of time/hours the Autoresponder should let pass between responding to the same email address. Basically, this setting determines how often a message should be sent to the same sender when one person sends you an email several times.
In the "Email" setting, you need to type out your email address. In the "From" setting, you need to put in from whom the message is, so you either put in your name or someone else's, depending on what you want.
In the "Subject" set, you put in the subject of the automated email that the Autoresponder would send out. For instance, "In a meeting."
In the "Body" setting, you should type out the automated message's content. For this, you can make a custom HTML body that can have various links, images, etc., in them. Usually, people put information like when they are back from a holiday in this setting.
The last two settings, the "Stay" and "Stop" boxes, are used to set up the time when the Autoresponder should begin with responding, and it should automatically stop. This means that you will not have to turn it on and off by yourself manually.
Author: TxWeb Last update: 2025-01-19 11:07
Configure email in Microsoft Outlook (Microsoft 365)
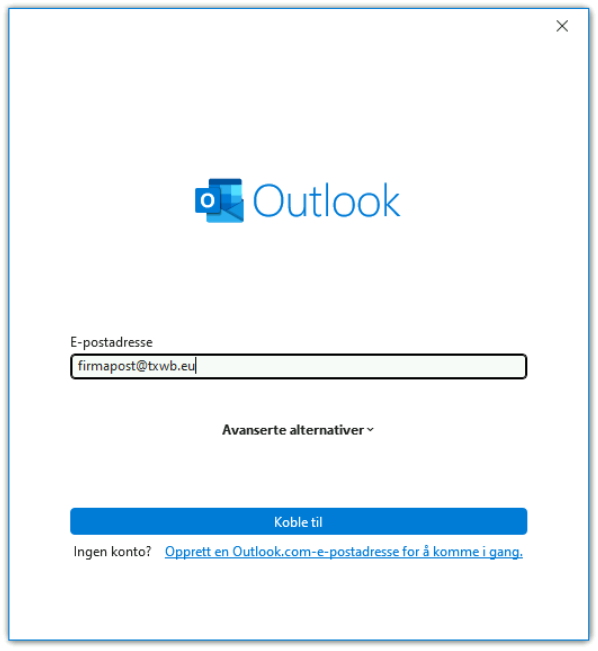
In Outlook, click "File" and "Add account".
The following screen shows up where you type in your e-mail account address:
Click "Connect" and type your password and click "Connect" one more time.
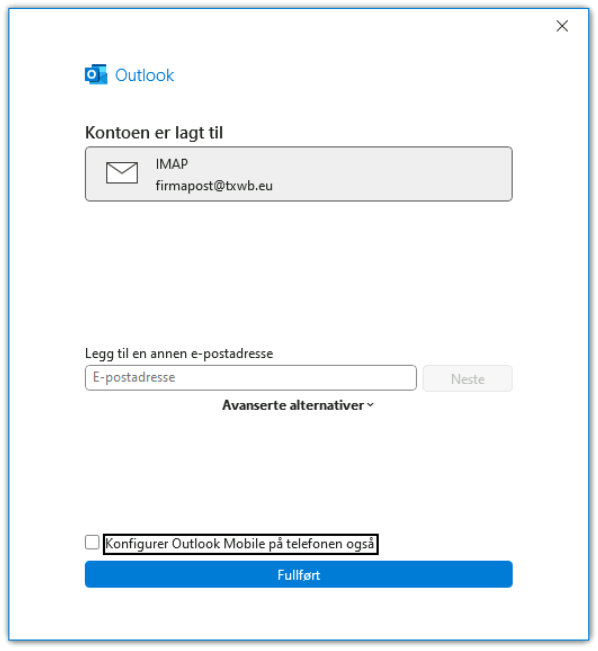
If you do not wish to add your account to mobile phone, you can uncheck the "Configure Outlook Mobile on your phone", Click finnish.
Your email account should now be done.
Normally Outlook will find all the server settings itself, but if you run and older version of Outlook that does not support automatic configuration the following settings is recommended:
INCOMMING EMAIL
Protocol:
IMAP
Incomming server:
mail.dittdomene.no
Incomming port:
993
Encryption method:
SSL/TLS
SPA:
No
OUTGOING EMAIL
Outgoing server:
mail.dittdomene.no
Outgoing port:
465
Encryption method:
SSL/TLS
SPA:
No
Authentication:
"Use same settings as for incomming e-mail"
Author: TxWeb Last update: 2025-01-19 13:31
Configure calendar in Microsoft Outlook (Microsoft 365)
Unfortunately, Outlook does not have built-in support for server-synchronized calendars like Thunderbird does. However, there is a third-party tool that allows you to synchronize your calendar with the server in Outlook.
Go to https://caldavsynchronizer.org , go to "Download", download and run the installation file. The installation will ask you to confirm the installation location and ask you to click "next" a couple of times before it is complete.
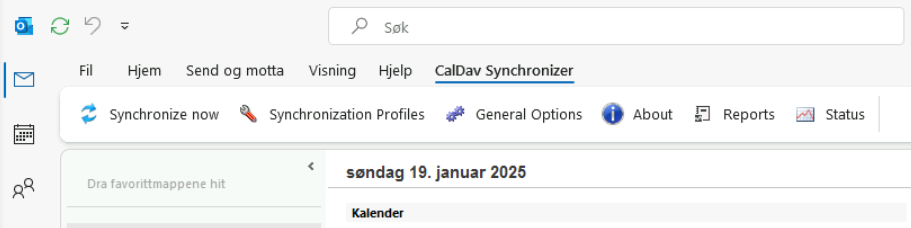
Start or restart Outlook on your PC.
You should now have an option for "CalDav Synchronizer" in the Outlook menu:
Click on this one.
Click "Synchronization Profiles"
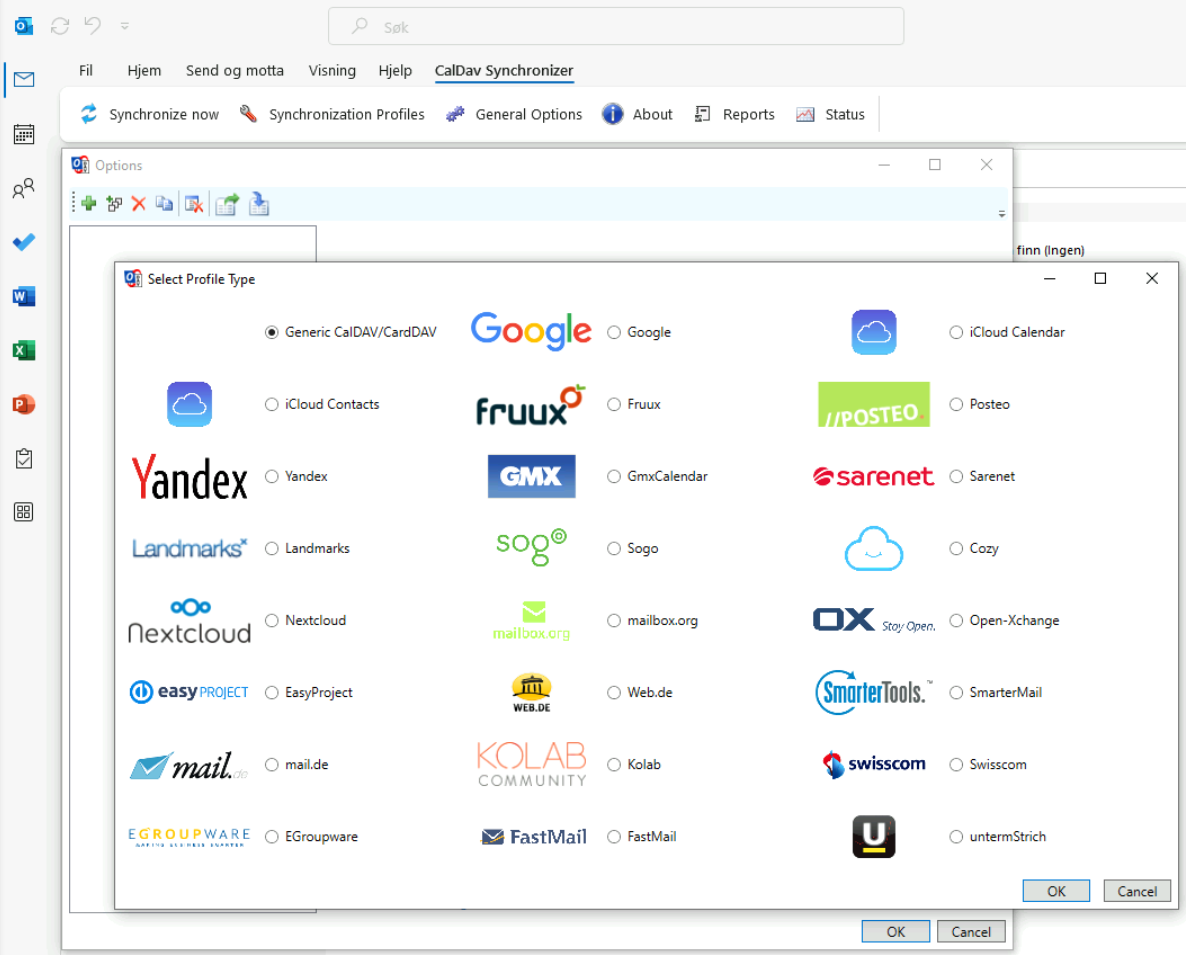
Click on the "+" sign in the top left
Select "Generic CalDAV/CardDAV"
Click OK
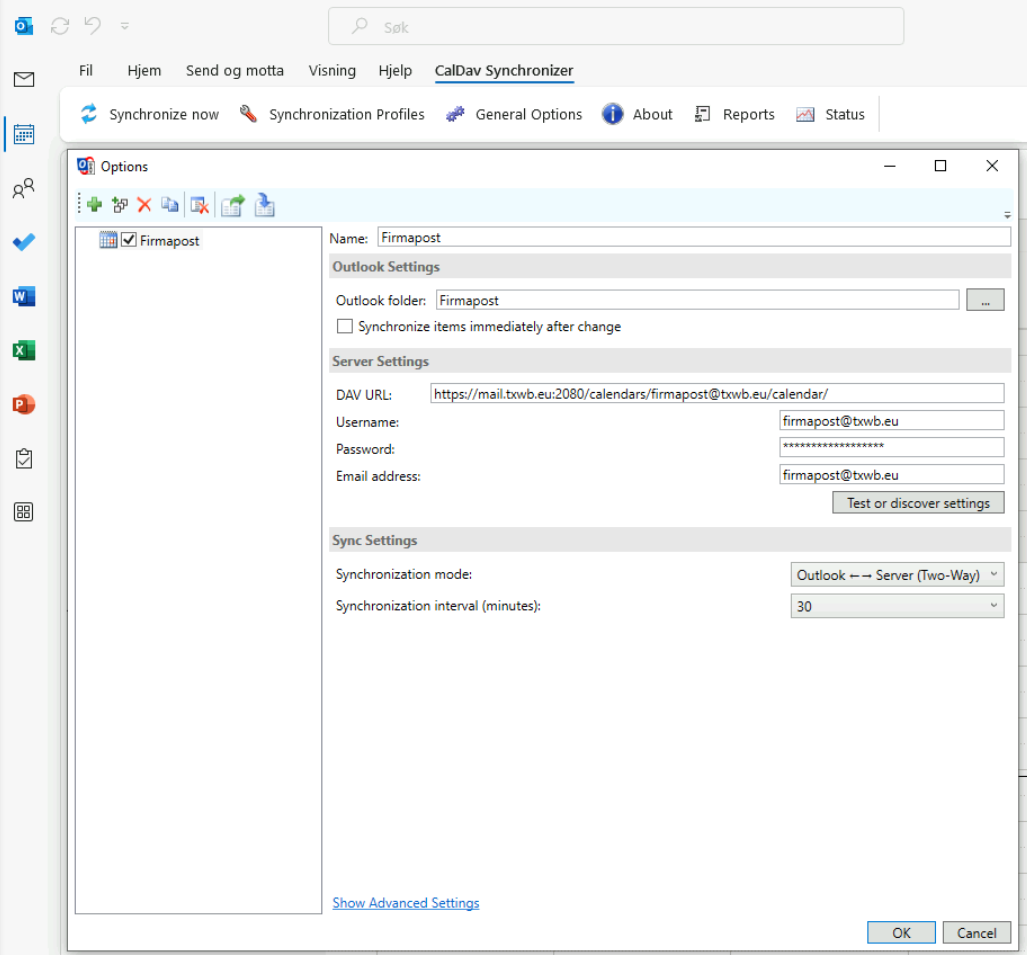
In the image that appears, select the following:
Name: a name for the calendar you choose
Outlook folders: click the three-dot button on the right and select a local calendar from Outlook
DAV URL: You can find this in the first email in your email account. This is, for example, https://mail.yourdomain.com:2080/calendars/yourname@yourdomain.com/calendar/
Username/Password/Email: this is the same as your email account username and password
Click OK
Click "Synchronize now" and your local calendar in Outlook will be synchronized with the server.
Author: TxWeb Last update: 2025-01-19 13:44
Configure email/calendar in Thunderbird
Thunderbird is a free and open source email client developed by Mozilla, which offers features such as email management, calendaring and address book. It can be installed on Microsoft Windows, Apple macOS and Linux. They also have a client for Android mobile phones, but this currently lacks a calendar function.
The website encourages donations to the project, but this is voluntary and the program is completely free.
The installation will ask you to click "Next" a few times before the program is completely installed.
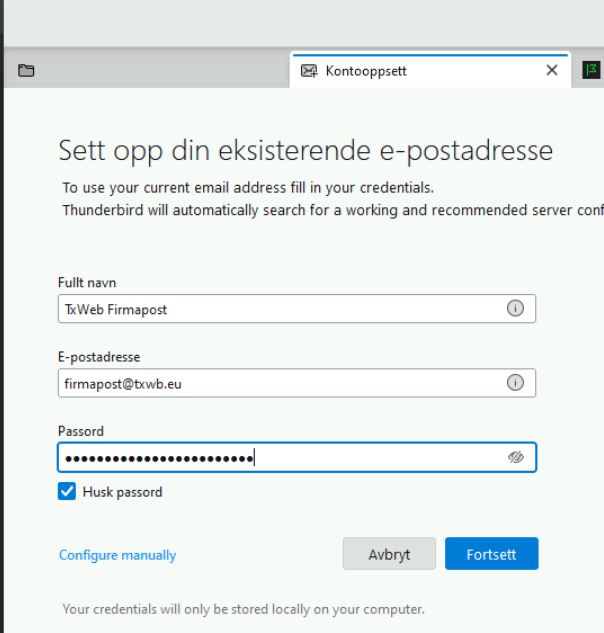
When you start Thunderbird for the first time, it asks you to enter your name, email account, and password:
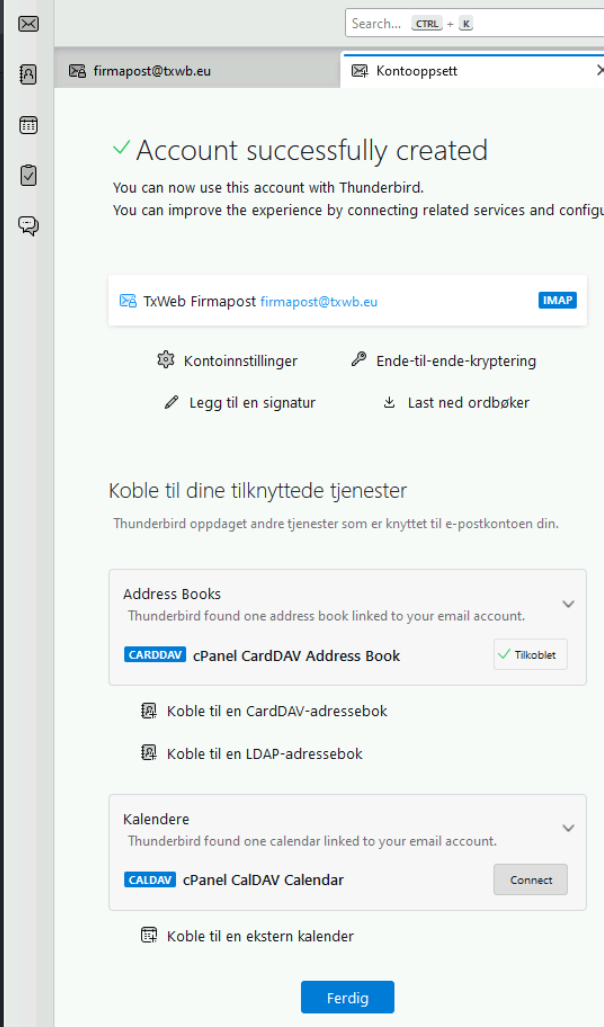
In the next image, you have the option to automatically connect Thunderbird to your server-synchronized calendar and address book.
To do so, click "Connect" on the two buttons under "Address Book" and "Calendars". The buttons will change text to "Connected":
Now click "Done" and Thunderbird should be fully set up with email, calendar and address book all synchronized with the server.
If Thunderbird is unable to retrieve the settings automatically or you for some reason need to change the server settings, the following setup is recommended:
INCOMING EMAIL
Protocol:
IMAP
Incoming server:
mail.yourdomain.com
Incoming port:
993
Connection security:
SSL/TLS
Authentication method:
"Regular password"
OUTGOING EMAIL
Outgoing server:
mail.yourdomain.com
Outgoing port:
465
Connection security:
SSL/TLS
Authentication method:
"Regular password"
Author: TxWeb Last update: 2025-01-19 13:39
How to Transfer in IMAP Emails Using an IMAP Transfer Tool
IMAP (Internet Message Access Protocol) is an email access protocol used to configure mail accounts to a local or remote Web server. IMAP is one of the most commonly used Email protocol for receiving emails, it is supported by all modern clients and web servers. IMAP Server is always used while sending and receiving email messages. When you move to a new server or email provider, existing emails will not be available until you migrate them into the new mailbox.
Email Migration or Mailbox Migration is the process of migrating an email message (or messages) from one mail client to another mail client. To copy emails From one Server to another using IMAP, both of your servers/hosting accounts must support the IMAP email protocol, TxWeb servers support IMAP.
When you switch to another hosting provider, your emails will likely need to be transferred as well. If you are moving between cPanel-based hosting providers, you should be able to take advantage of the full cPanel backup and migrate all of your settings. This is an easy method of transferring email from one server to another, using matching IMAP email accounts. You can use this IMAP tool https://imapsync.lamiral.info/X/ , it i s free and comes highly recommended.
To Transfer in IMAP Emails using an IMAP Transfer tool you will need:
An IMAP-capable local email client(Thunderbird or Outlook). SMTP server(Outgoing Server) - your cPanel account hostname/IP address IMAP server(Incoming server) - your cPanel account hostname/IP address Username(email@domain): The full name of your email account Password - the password for your email account you set during the creation process in your cPanel(please note the password for both accounts must be the same) IMAP Port: 993 SMTP Port: 465 TLS/SSL support - Disabled
To Copy IMAP Emails to IMAP Account, follow the steps below:
Download and install an IMAP-capable email client such as Thunderbird or Outlook.
Start the IMAP to IMAP Migration Tool.
Configure your email account(s) (email@domain.com) to work with the settings of the previous hosting provider(email address, password and configuredusing IMAP)
Login to your TxWeb cPanel to create the same email account under your new hosting account. Use the same spelling, capitalization and password(It is important to change the password after the migration process). If you need help, follow our tutorial on How to Change your Webmail Password in cPanel
Enter source IMAP account credentials, and enter the credentials of the destination IMAP account with all the IMAP details – IMAP Server and Port No.
Choose the folders for migration.
Click the next button to Migrate IMAP to IMAP account
Once the process is completed, proceed to the next button to export IMAP emails to IMAP account.
Use the same settings for the IMAP and SMTP.
Add the IMAP email account you want to move emails to in your email client
Repeat the same steps for each folder you want to copy
Using this method your email client will actually copy all messages from your current host to your TxWeb cPanel email account. Once completed, your transfer is now successful and your old emails will be in your mailbox on the new server/hosting account.
The time period of extraction depends entirely on the number of emails and your Internet Speed, so give it some time to be completed. When you successfully complete the email transfer, allow some time to ensure the process has worked smoothly, and then you can safely remove the first mail@domain.com and continue using your mail accounts with TxWeb. To host your domain's email with TxWeb, you will also have to update the domain's MX records. This can be done under Domains / Zone Editor in cPanel. If you need help with this, log in to http://clients.txwb.eu and create a support ticket.
To avoid loss of emails when moving your email account from an old hosting account to another, it is a good idea to create a forwarder on the old hosting server so that emails are sent to a third-party email account. This allows you to keep a copy of emails sent to your old email account during the transfer period.
Author: TxWeb Last update: 2025-01-21 21:49
How to Change your Email Password in cPanel
Everyone of us has many passwords to manage on a daily basis. One study even suggests that we're each juggling a huge 100 passwords across various sites and services.
Now if you ever forgot your email account’s password or need to reset it for security reasons, we’ve got your back!
All you need to do is to just follow the few steps below:
First and foremost, log in to your cPanel.
Once logged in, type in “Email Accounts” on the top right search bar or click on the Email Accounts option under the Email section.
Select the email account which password you wish to reset, and then click Manage.
On the next page, scroll to the Security section and enter the new password. We would recommend generating a strong one from sites like https://passwordsgenerator.net.
Once you note down the password, click the Update Email Settings.
The password for this particular email account will now be updated. Isn’t that too easy?
If for some reason, you are having issues logging in to your cPanel dashboard, you can also reset the email password from your Webmail interface.
The steps are described as below:
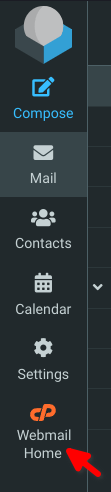
If you are using Roundcube, you can click cP Webmail Home on the left sidebar. On Horde, the option can be found on the top navigation bar. See screenshots below for reference:
This screen will then show up, scroll down and click the “Password & Security” section
Enter the new strong password and click Save once you’re done.
It’s always recommended to double-check if the new password has replaced the old one properly, or if you simply pasted the correct one on your notes. So go ahead and log out from your Webmail, then enter the email username, the password you just updated, and click the Log In button. If you are successfully logged in, that means you’re all set with your new password!
Author: TxWeb Last update: 2025-01-21 07:58
Setup Email Accounts on iPhone
It’s great to be able to access your email on the move. This guide will provide a step-by-step guide on how to add your email account with IMAP to the Mail app on your iPhone.
Kindly follow these instructions in order to set up your webmail on your iPhone.
Select Settings from the home screen of your iPhone, scroll down and click Passwords and Accounts
Select Mail, Contacts, Calendars
Click Add Account and click Other from the appeared list
Select Add Mail Account. Specify the following records in the New Account menu
Name: Your name will appear as the sender's name Address: Your email address that was created in your cPanel Password: Password for the email address you are using(the one used in webmail) Description: We recommend your email address( a name on account of your device, it could be anything)
Click Next and choose protocol type (IMAP). Input the appropriate details stated below in the 'New Account' page for the Incoming and Outgoing servers. We advise you to use IMAP.
Incoming server:
Host Name: server your account is hosted on (mail.yourdomainname.com) Username: Your email account Password: Password for the email address you are using(the one used in webmail)
Outgoing server:
Host Name: server your account is hosted on (mail.yourdomainname.com) Username: Email address Password: Password for the email address you are using(the one used in webmail) The settings are the same for IMAP and POP3 at this step.
Click Next to enable Notes and Mail, if you use IMAP Click on Save and wait for the verification to be completed
Once the verification is completed, choose your newly created account on the page you have been redirected to
Choose Advanced at the bottom of the page
Check if your inbox behaviours are set up correctly to make sure your emails are saved to the right place. You need to select the following folders on the server: Drafts box: Drafts Sent box: Sent Deleted box: Trash Archive box: Archive If no folder, or a different folder, is selected, tap the mailbox and select the correct folder on the server. Note: If the folder you are looking for is not listed, log in to Webmail and place an email in the missing folder. Then try again, it should now show up in the list. Set the correct mailbox behaviours for folders on the server
If you set an IMAP connection you need to use port 993 (with SSL). Set IMAP Path Prefix to INBOX. For the Outgoing Server (SMTP) select port 465 (with SSL):
To configure additional settings for the outgoing server, you will need to return to the previous menu and then go to Outgoing Mail Server by clicking on the hostname of the server:
Once you have verified your settings, your account is active and ready to use. You can now send and receive emails from your Mail app on your iPhone.
Author: TxWeb Last update: 2025-01-21 21:39
What is the Limit on the Email Attachment Size?
We forward email with attachments for up to 50Mb per email(including messages and attached files) . The size limit applies to the combined size of all the message elements, including text, headers, and all attached files. A server can only process so many requests at the same time, these size limits are put in place to avoid a total system collapse. Attaching files larger than 50 MB will result in a bounce-back email notification informing you that the attachment size has been exceeded.
Email size limits are used for performance, database size and security reasons:
Performance. Email systems are not designed to transfer large volumes of data. Database/storage size. Email data have limits because they are stored on a server. Security. A large number of messages could take a whole system down. Email systems usually use a limited number of ports to retrieve data. This makes them candidates for potential security vulnerabilities( DoS attacks)
An email service provider dictates its limit by performance and security reasons. When preparing your email newsletters, there are things you should keep in mind from the maximum size of file attachments and the HTML part to the email client of the recipient to email deliverability.
Author: TxWeb Last update: 2025-01-21 08:00
Plus Addressing
All email accounts support plus addressing, this means that you can add a "+" sign after your username part of the email address, e.g. name+whatever@yourdomain.com. This can be used for filtering email for different purposes or to register with the same email multiple times at a website.
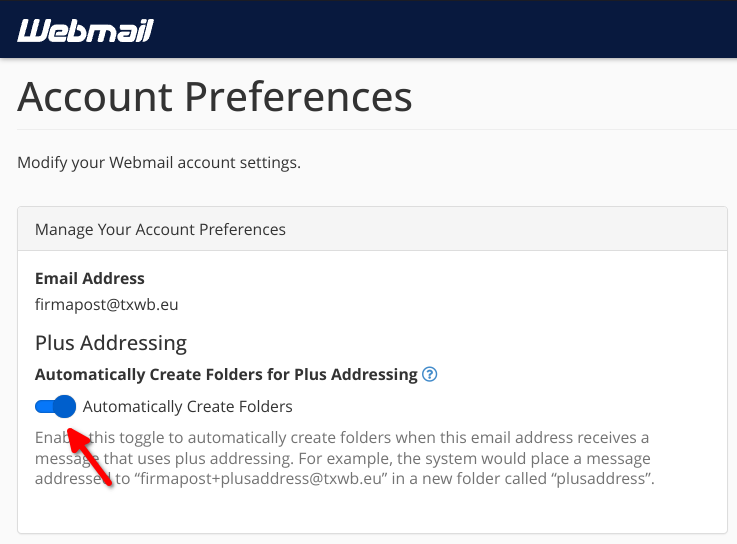
By default when using a plus address, this will automatically create a folder in your mail inbox. For example, the system would place a message addressed to “name+whatever@yourdomain.com” in a new folder called “whatever” in you inbox.
Note: In your webmail, new folders will automatically appear after a refresh. But in some email applications you might have to restart the application or manually add a new "subscription" to the folder. This is ususally done with right clicking the email account and choosing "subscription" or "IMAP-folders". There you should be able to refresh and add the new folders.
If you want to disable the default behaviour of automatically adding new folders for the +mails, you can go to you email settings at the webmail system. To do this:
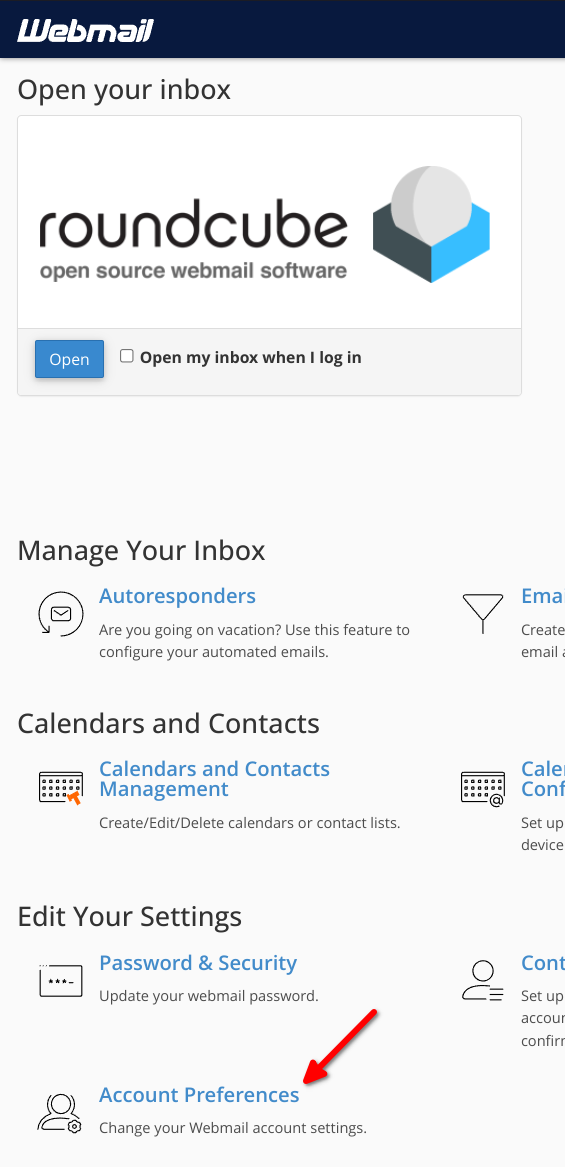
Go to https://webmail.[yourdomain.com]
If you are in the inbox view, then click "Webmail Home"
Under "Edit Your Settings", click "Account Preferrences"
Toggle the "Automatically Create Folders" to the OFF position:
Author: TxWeb Last update: 2025-01-21 21:32
Web Hosting
Changing web hosting subscription
How to change your web hosting subscription
Subscription changes can be made at any time and are performed by creating a support case.
Enter which subscription you want to upgrade or downgrade to.
Billing when changing web hosting subscription
When upgrading, an interim invoice will be issued until the next scheduled subscription period. When this is registered and paid, the subscription will automatically be upgraded.
Upon downgrading, a credit will be issued to the customer account and the subscription will be automatically downgraded. The next invoice for the next scheduled subscription period will be credited against this and will therefore be lower than normal.
Author: TxWeb Last update: 2025-01-20 08:02
Multiple domains against the same web hosting subscription
You can link as many domains as you want to a web hosting subscription. These will be linked to the same website as your main domain.
You can also add subdomains (e.g. subdomain.yourdomain.com). These will be linked to separate folders on your site and can be set up with different websites than your main domain.
Go to the "Domains" section and the "Domains" option
Click "Create a New Domain"
Enter your new subdomain name (e.g. subdomain.yourdomain.com)
To have other website on this subdomain, "Share document root" should be OFF.
You can now enter the folder name you want this subdomain to point to (the default which is the name of the subdomain should already be filled in)
Click "Submit"
Author: TxWeb Last update: 2025-01-20 18:42
Sitejet Builder
Sitejet is a web building platform and tool that combines web design, project management, and collaboration features, with a special focus on professional web designers, agencies, and freelancers. The platform allows you to build, manage, and maintain websites efficiently.
Main features of Sitejet Builder:
Drag-and-drop interface : Sitejet uses a visual interface where you can drag and drop elements to design websites without the need for advanced coding, making it easier to create modern, responsive websites quickly.
Responsive design : The tool makes it easy to create websites that are optimized for different devices, including mobile phones, tablets, and desktops.
Combination of code and no-code : For more advanced users, Sitejet allows you to use HTML, CSS, and JavaScript to customize the design and functionality in a more flexible way.
Collaboration features : The platform makes it easy to share drafts with clients for feedback and approval, simplifying the collaboration process between designers, developers, and clients.
Advantages of Sitejet:
Flexibility with both visual editing and coding.
Easy to use, even for beginners.
Good collaboration opportunities with customers.
Scalable for both small and large projects.
Limitations:
Requires some time to learn all the features if you are new.
Overwrites all content under the /public_html/ folder when publishing. NOTE! If you need files on your websites that are not included in the upload from SiteJet Builder, these must be placed in another area. For example, in the area of a subdomain .
Sitejet is ideal for those who want an all-in-one web design solution, with a strong focus on collaboration and efficiency.
A short Sitejet Builder tutorial video
Author: TxWeb Last update: 2025-01-23 08:00
Upload files to website
There are several ways to transfer files to or from your website, but the recommended ones are directly in cPanel or via FTP.
Transferring files in cPanel
Log in to https://kunde.txweb.no/ , go to "Products and Services" / "Manage Web Hosting" and click "Login to Control Panel". You will now be taken to the cPanel administration pages.
Under the "Files" section, click "File Manager".
Here you can manage the files on your web hosting. The websites for your main domain are located under the "public_html" folder.
Transferring files with FTP
Set password on web hosting account
If you haven't already done so, you must set a dedicated password for your web hosting user. This is done as follows: Log in to https://kunde.txweb.no/ , then:
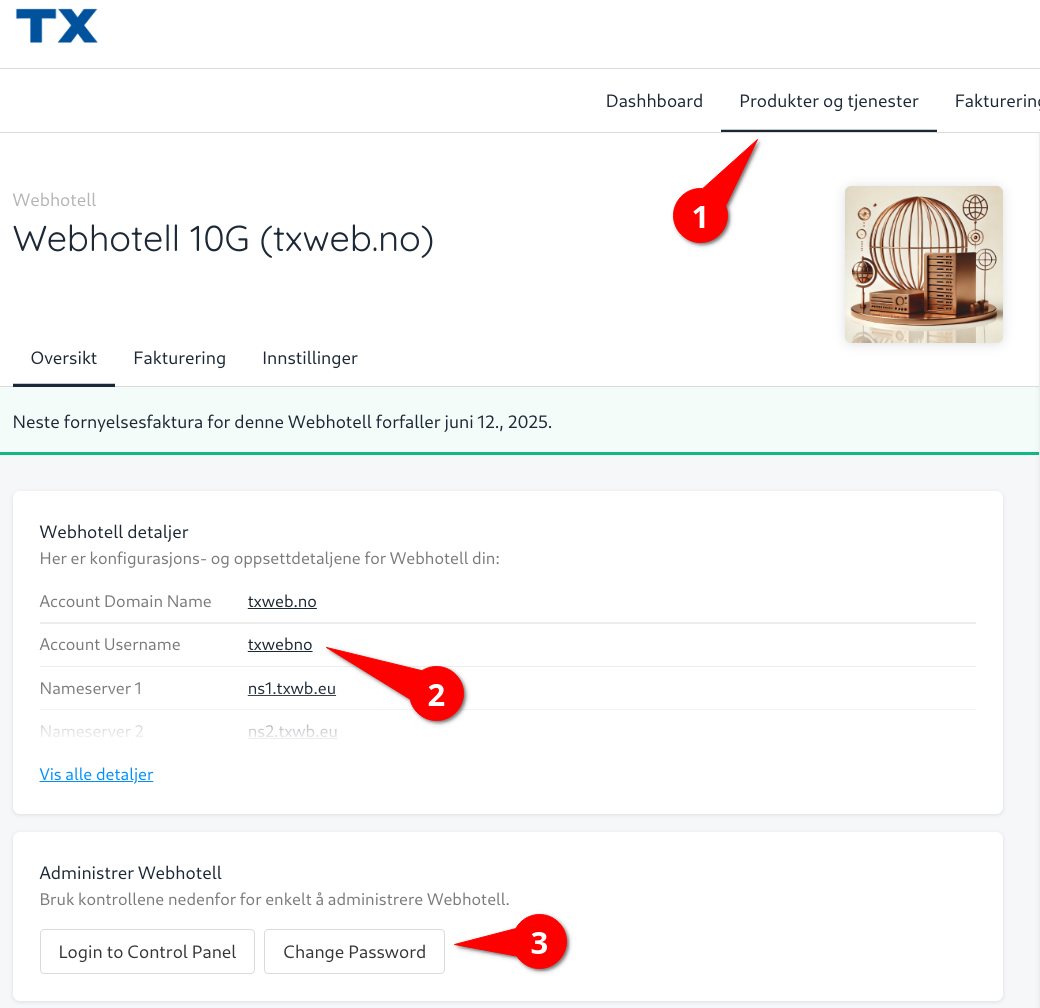
Go to: "Products and Services" / "Manage Web Hosting".
Make a note of your "Account Username".
Click "Change Password". It is important that this is a long and complex password to prevent unauthorized access. It is recommended to use a password manager to generate and store the password.
This password can now be used in an FTP client and it can also be used to log in directly to the cPanel administration pages at https://cpanel.yourdomain.no.
FTP client setup
There are many FTP clients. Some that can be recommended are: - FileZilla (Linux / Windows / Mac) - CoreFTP (Windows) - Cyberduck (Windows / Mac)
It is important to use the secure SFTP as the protocol. Make sure your FTP client is set to use SFTP.
SFTP username: [username you noted from "Account Username" in step 2] SFTP server: ftp.yourdomain.com SFTP port: 22